
Headlights can gradually lose their clarity as years of exposure to sunlight, dirt, and weather take their toll. The lenses may turn cloudy or yellow, making it harder to see the road clearly at night. While this often happens slowly, the difference becomes more noticeable as the haze builds up.
Fortunately, some types of cloudiness can be removed without replacing the headlights. This guide explains how to restore headlights, starting with identifying the cause of the haze. You’ll also learn how to sand, polish, and protect the lenses, along with when professional help or replacement may be necessary.
How to Restore Headlights
You can restore cloudy or oxidized headlights by following these five steps:
- Wash the headlights with car shampoo and water to remove dirt and grime.
- Mask the surrounding paint with automotive masking tape to protect it during sanding.
- Wet-sand the lenses using progressively finer sandpaper to remove oxidation.
- Polish the headlights with a plastic polishing compound to restore clarity.
- Apply a UV-protective coating to protect the restored surface from sunlight and oxidation.
Below, we’ll explain each step in more detail to help you restore your headlights properly.
Diagnose the Haze Before You Start
Two different problems look alike from the driver’s seat, and only one is fixed by sanding.
Signs the haze is on the outside
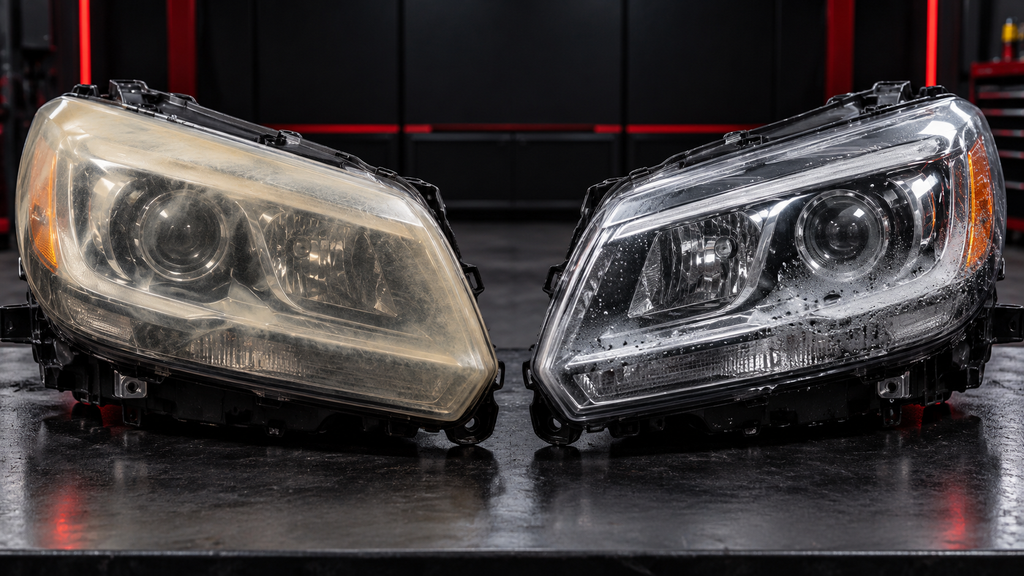
Exterior oxidation feels rough or chalky when you run a clean fingertip across the lens. The color is often uneven: yellowing tends to be strongest where the lens gets the most sun, and scratched areas show up as streaks or spots. A soap and water wash removes road film but leaves the cloudiness in place, which points to oxidized or scratched plastic.
The cause is usually UV damage. Lenses carry a clear protective coating, and once it wears off, sunlight oxidizes the plastic underneath and turns it yellow. Road debris scratches and chemical residue add to the problem.
Signs the haze is inside the housing
Interior fog looks like a uniform milky haze that appears the same from every angle. You may see moisture or droplets inside the lens, and cleaning the outside changes nothing.
Interior fog may indicate a failed housing seal, and sanding won’t fix moisture trapped behind the lens. Repair may involve drying and resealing the housing or replacing the assembly. Because some headlight units are difficult to open and reseal properly, professional repair may be necessary.
How severe is the damage?
The severity of headlight oxidation determines how much surface treatment may be needed. Light haze may only require polishing, while moderate or heavy oxidation often calls for wet sanding with progressively finer grits. The table below explains how to assess the damage and choose an appropriate restoration method.
| Haze Level | What It Looks Like | Restoration Needed | Rough Time Estimate |
| Light | Slight dullness or early yellowing | Clean and polish; light sanding only if necessary | Usually the shortest job |
| Moderate | Visible yellowing, chalky surface, reduced light output | Wet-sand through progressively finer grits, then polish and apply UV protection | Several steps; time varies by kit and condition |
| Heavy | Severe yellowing, rough surface, deeper surface scratches | May require coarser sanding, such as 400-600 grit, followed by finer grits, polishing, and UV protection | Generally longer; no established time estimate |
Follow your restoration kit’s instructions, since starting grits and sanding sequences vary by product. Deep cracks, internal haze, or severe damage may require professional assessment or headlight replacement.
What You Need for a Full Restoration
Headlight restoration requires basic cleaning supplies, sanding materials, polishing products, and UV protection. The main items include:
- Cleaning supplies – Car shampoo or mild soap, water, and microfiber cloths.
- Masking tape – Automotive tape for surrounding paint and trim.
- Sandpaper – Progressively finer grits, such as 800, 1,000, and 2,000, with coarser options for heavy oxidation.
- Polishing supplies – Plastic polishing compound and a hand applicator or drill-mounted pad.
- Finishing supplies – A spray bottle, coating-compatible surface cleaner, and UV-protective coating.
Pre-packaged restoration kits offer a convenient alternative, often including most of these materials. Some contain sanding and polishing supplies, while others use simpler cleaning and coating systems for lighter haze.
How to Restore Car Headlights Step by Step
Wash the lens
Wash with car shampoo or mild soap and water, then dry completely. Skip solvents and household glass cleaners, which can leave residue and may damage plastic. Dirt left on the lens gets dragged across the surface by the sandpaper and creates new scratches.
Mask off the paint
Tape every edge of paint, trim, and rubber around the lens, in more than one layer. Sandpaper and compound dull paint quickly, and repairing it is a bigger job than the headlights themselves.
Wet sand in stages
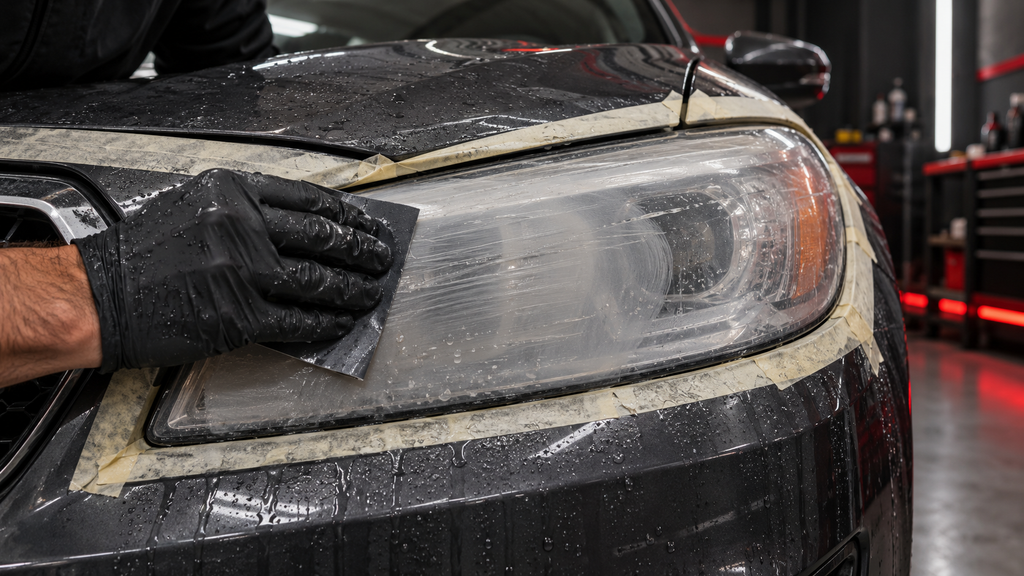
Sanding removes the oxidized layer and replaces it with finer and finer scratches until the surface is smooth enough to polish. Work from the grit your severity level calls for up through 2,000.
Sand in one direction per grit, then switch (many people go perpendicular) for the next. When the new scratches fully replace the old ones, you can see it is time to move on, and one careful direction per grit also makes missed spots obvious.
Keep the surface wet throughout sanding. Water lubricates the sandpaper, washes away debris, and helps prevent clogging. Between grits, wipe the lens dry and check for a uniform scratch pattern, with no glossy patches or deeper scratches from the previous grit. The final 2,000-grit stage should leave a fine, even finish ready for polishing.
Polish
Sanding leaves a uniformly frosted surface. Polishing with a rubbing compound removes those fine 2,000-grit scratches and brings back clarity. Work it in with a drill and compound pad, or by hand with a microfiber cloth. If using a drill, spread the compound at low speed first to avoid splatter, then increase speed and cover the whole lens. Wipe off residue with rubbing alcohol.
Seal
Sealing helps protect the restored headlights from future oxidation. Since sanding removes the remaining factory UV coating, apply a headlight-specific UV-protective coating in thin, even layers, following the manufacturer’s instructions.
Drying and curing times vary by product, so check how long to wait before driving, touching, or washing the headlights. The durability of the protection also depends on the coating used, application conditions, and exposure to sunlight and weather.
Can You Restore Headlights With Toothpaste?
Yes, but only temporarily. Gritty toothpaste contains mild abrasives that polish away a thin layer of surface grime and light oxidation. It isn’t a substitute for sanding.
| Factor | Toothpaste | Full Sanding Kit |
| Effectiveness on Light Haze | Fair; can brighten a dull lens | Excellent |
| Effectiveness on Moderate/Heavy Haze | Poor | Good to excellent |
| How Long Results Last | Short; no UV protection | Long when sealed with UV coating |
| Cost | Very low | Low to moderate |
| Risk of Damage | Low | Moderate if technique is poor (uneven sanding, paint damage) |
Toothpaste, baking soda, vinegar, and cola may temporarily improve cloudy headlights, but the haze often returns without UV protection. Sanding, polishing, and sealing provide a more durable restoration.
Yellow Headlights vs. Foggy or Cloudy Headlights
Yellowing and cloudiness often result from the same problem, but they look different. Yellowing typically develops as sunlight damages the plastic’s protective coating, while cloudiness can come from surface oxidation, fine scratches, or dirt buildup.
Many aging headlights show both signs. Surface damage can often be corrected through sanding, polishing, and UV protection. However, heavily yellowed lenses may need more sanding, while moisture trapped inside the housing requires a different repair.
Preventing Headlights From Oxidizing Again
Keeping headlights clear starts with limiting UV exposure and maintaining clean lenses. Park in the shade when possible, and wash your car regularly to remove dirt and road grime that can reduce light output.
UV protection is equally important. Just as ceramic coatings require maintenance, headlight coatings need periodic attention, so follow the manufacturer’s reapplication instructions. Use proper washing techniques to avoid fine scratches caused by improper cleaning, and address early signs of haze before oxidation becomes severe. Avoid unnecessary polishing, as it can remove protective material from the lens.
When to Call a Professional
Knowing how to restore headlights yourself is useful, but some problems require professional attention. Deep pitting, cracked lenses, damaged internal reflectors, or moisture inside the housing cannot be fixed through sanding and polishing alone. Depending on the damage, the headlight may need repair or replacement.
Professional help is also worth considering when oxidation is severe, previous restoration attempts have failed, or you’re unsure how much sanding the lenses can tolerate. For surface damage that can still be corrected, professional headlight restoration can help restore clarity through controlled sanding, polishing, and UV protection.
Poor restoration can also affect visibility. Uneven sanding or polishing may leave haze that scatters light and causes glare at night. Even if the lenses appear clear in daylight, they may still reduce visibility after dark.
Frequently Asked Questions
How long does a headlight restoration typically last before it needs to be redone?
Headlight restoration can last a year or longer, depending on the UV coating used, application quality, and exposure to sunlight and weather. Regular washing, parking in the shade, and reapplying UV protection as recommended can help maintain clarity and delay oxidation.
Is it safe to use a power drill with sanding pads instead of sanding by hand?
Yes, for polishing and for kits designed for it. Start slowly, spread compound at low speed, and keep the pad moving, because heat and pressure in one spot can damage the plastic. For the sanding stages, hand sanding gives you more control.
Can headlight restoration remove deep scratches, or only surface haze?
Headlight restoration can remove surface haze and some shallow scratches through sanding and polishing. However, the results depend on the depth of the damage. Deep gouges or cracks may require lens or headlight assembly replacement.
Do LED headlights fog up the same way halogen headlights do?
Yes. Both LED and halogen headlights can develop cloudy or yellowed plastic lenses from UV exposure, regardless of the light source. Moisture can also cause temporary fogging inside either type of headlight. Persistent condensation or water buildup may indicate a ventilation or sealing problem that requires inspection.
What happens if you skip the UV sealant step after sanding?
The lens loses its remaining UV protection and starts yellowing again, often within months. Sealing is what makes the repair last.