
Leather seats can look pristine for years, then suddenly start showing stains, dullness, or early cracking. In many cases, the problem is not normal use alone. Harsh products, heavy scrubbing, and poor cleaning habits can wear down the protective finish faster. Even small mistakes repeated over time can leave the surface looking dry, uneven, or prematurely worn.
The best way to clean leather car seats is to use the right products, light pressure, and a method that matches the seat condition. This guide explains routine cleaning, stain removal, perforated leather care, and when professional detailing is the better option.
How to Clean Leather Car Seats
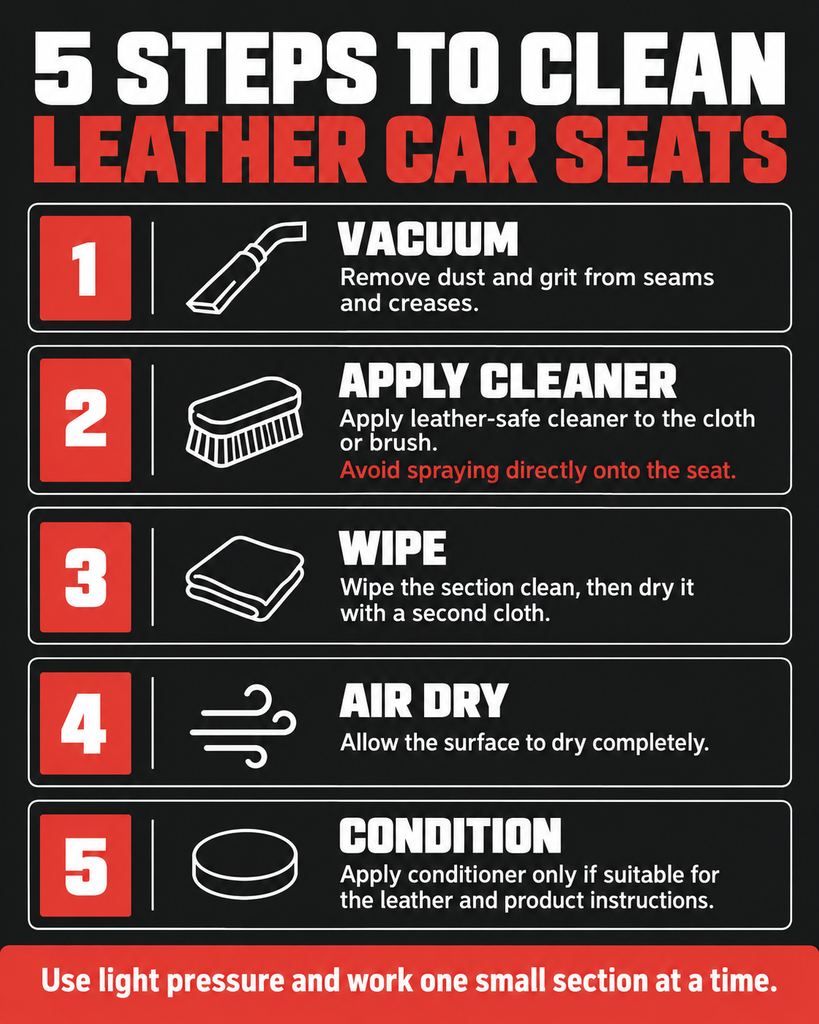
Here’s how to clean leather seats in five clear steps. Each one is explained in more detail below, so use this as a quick overview of the full process.
- Vacuum every seam, crease, and crevice.
- Apply a pH-neutral leather cleaner – to a cloth or brush, not straight onto the seat.
- Wipe with a damp cloth, then a dry cloth, same section, before moving on.
- Air dry completely before you touch step five.
- Condition to replace the oils the cleaning step just stripped out.
Skip step one, and you’re grinding grit into the hide during step two, which is how fine scratches show up. Skip step four and rush into conditioning, and you trap moisture under the conditioner instead of oil; that’s the residue film you sometimes see on seats that were “just cleaned”.
What You’ll Need
Before cleaning, gather products that are safe for automotive leather and gentle on its protective finish.
- Vacuum with a brush attachment – Removes grit from seams and creases
- pH-neutral leather cleaner – Cleans without harshly attacking the finish
- Soft-bristled detail brush – Loosens dirt from textured leather
- Microfiber cloths – Use one for cleaning and another for drying
- Leather conditioner – Helps maintain softness after cleaning
What to avoid
Skip dish soap, household all-purpose cleaners, baby wipes, bleach, and ammonia-based glass cleaner. These products can be too aggressive for automotive leather and may dry, dull, or damage the protective coating. Use a cleaner made specifically for leather instead.
Step-by-Step – Deep Cleaning Leather Seats
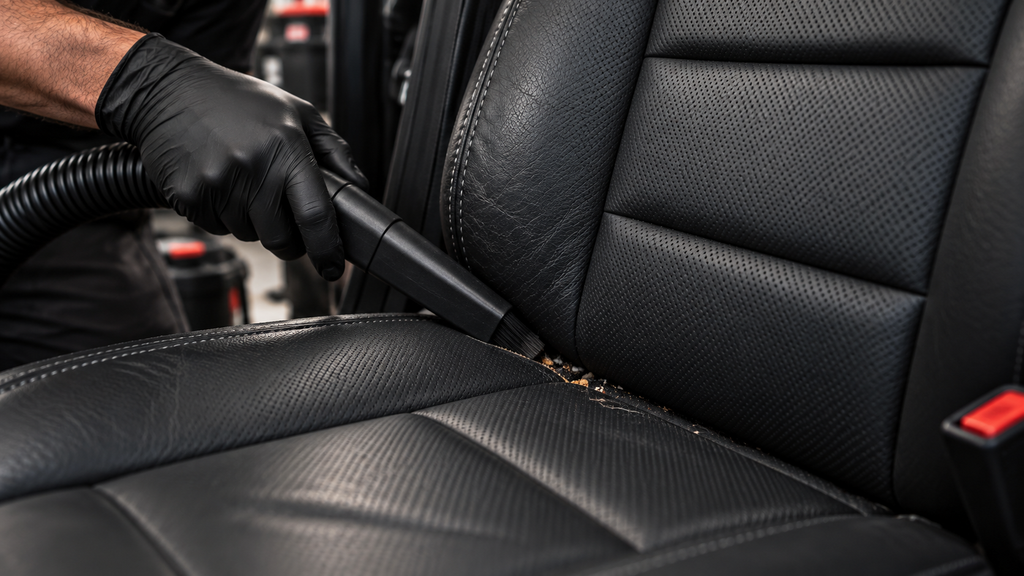
Vacuum every crevice
Focus on the seams, the seat back where it meets the cushion, and the crease where the bottom cushion folds. Debris hiding in those spots is exactly what turns into a fine scratch the moment you start scrubbing. The vacuum keeps step two from causing damage.
Apply the cleaner in small sections
Spray the cleaner onto your cloth or brush, not directly onto the seat, because direct spray pools in seams and stitching, sits too long, and can stain the thread. Work one section at a time with light pressure. Heavy pressure doesn’t clean better; it pushes dirt and cleaner deeper into the leather’s pores, which is often why a “cleaned” seat still looks dull once it dries.
Wipe, then wipe again
Go over the section with a damp cloth first, then immediately follow with a dry one; do the same section before moving to the next. If the cleaner is left to sit and dry on the surface, it leaves a hazy film that’s genuinely harder to remove than the dirt you started with.
Let it air dry completely
Give the leather at least 30-60 minutes before conditioning, longer in humid conditions. Don’t speed this up with direct sun or a hairdryer, because fast, high-heat drying pulls moisture out unevenly and often triggers surface cracking, especially on seats that are already aged.
Condition the leather
Once the seats are completely dry, apply a small amount of leather conditioner with a clean microfiber cloth. Work it in evenly without oversaturating the surface, then buff away any excess. Conditioning helps keep the leather supple after cleaning and can reduce the dry, dull feel that develops over time.
Skipping this step can leave freshly cleaned leather feeling dry and unprotected. Just make sure the surface is fully dry first, since applying conditioner too early can trap moisture and leave behind a greasy or hazy residue.
How to Clean Perforated Leather Car Seats
The best way to clean perforated leather car seats is to use as little moisture as possible. The small holes in the leather can allow cleaner and water to reach the foam beneath the surface, where moisture takes much longer to dry.
Apply cleaner to a barely damp microfiber cloth instead of spraying it directly onto the seat. Use light pressure and wipe across the surface without forcing liquid into the perforations. Follow each section with a dry microfiber cloth to remove any remaining moisture.
Conditioner should also be used sparingly on perforated areas. Apply only a small amount if needed, and avoid oversaturating the surface. Solid bolsters and side panels can usually be conditioned more normally because they do not have the same moisture risk.
Removing Common Stains from Leather Seats
| Stain Type | What Works | What to Avoid |
| Ink or pen | Dab (don’t rub) with isopropyl alcohol on a cotton swab, working from the outside of the stain inward | Rubbing outward, which spreads the stain over a wider area |
| Grease or oil | Blot excess first, then a small amount of cornstarch or baking soda left to absorb for 15 minutes before wiping away, followed by pH-neutral cleaner | Hot water, which sets oil into the leather’s pores |
| Blood | Cold water only, blotted immediately; never hot | Hot water or scrubbing, both of which set the stain permanently |
| Dye transfer (denim, new shoes) | pH-neutral leather cleaner with light agitation from a soft brush; repeat rather than pressing harder | Heavy scrubbing, which can push the dye deeper instead of lifting it |
| Water rings | Light, even buffing with a barely damp cloth, followed by conditioner across the full panel to even out the sheen | Spot-treating only the ring, which leaves a visible boundary |
Timing matters more than the product you use. A fresh stain treated within a few hours usually lifts with the steps above. A stain that’s had a week or more to set has typically worked past the finish coat and into the leather itself. At that point, DIY treatment can lighten it, but full removal is usually a job for a professional.
How to Remove Mold from Leather Car Seats
Mold usually develops when moisture stays trapped after a spill, leak, or long period of humidity. It often starts in seams, under seat covers, or beneath perforated leather where drying takes longer.
For light surface mold, ventilate the car first and wear gloves and a mask. Use a barely damp microfiber cloth with a leather-safe mold cleaner, and blot the affected area gently. Avoid aggressive scrubbing, which can spread spores and push contamination deeper into the seat.
This is where cleaning leather car seats shifts from routine maintenance to damage control. Surface cleaning may remove visible mold, but it will not fix contamination inside stitching or foam padding.
If the mold returns, the seat smells musty, or the source appears to be below the surface, professional cleaning is the better option. The moisture source should also be found and repaired, or the mold is likely to come back.
Conditioning and Protecting Leather Seats
Conditioning helps maintain leather after cleaning, especially in high-wear areas like seat bolsters and other flex points. These spots experience more friction and movement, so they often show dryness and cracking first.
Apply a thin, even layer with a clean microfiber cloth or applicator pad. Let it sit for the time recommended on the product label, then buff away any excess to avoid a greasy finish or dust buildup.
For general maintenance, conditioning every three to six months is usually enough. More frequent care may help if the car spends a lot of time in direct sun, outdoors, or in changing temperatures.
For a Real Deep Clean, a Professional Detailer Is the Best Choice
DIY cleaning works well for routine maintenance, but it has limits. Deep stitching grime, layered body oils, and set-in stains often require professional car detailing, tools, and treatment.
| DIY Cleaning | Professional Detailing | |
| Best For | Routine upkeep; light dust, fresh spills, surface grime caught early | Neglected interiors, seats that haven’t been cleaned in over a year, or stains that DIY attempts have already made worse |
| Tools Used | Spray bottle, microfiber cloth, soft brush | Extraction equipment, low-moisture steam, commercial-grade pH-balanced cleaners and conditioners not sold at retail |
| Time Required | 20-30 minutes per seat | 1-3 hours per vehicle, depending on condition |
| Result on Old Stains | Lightens set-in stains at best; often can’t fully lift them | Reaches stains that have bonded into the leather’s pores, typically restoring a near-original look |
If a stain has been sitting for weeks, or your seats have gone a year without a proper clean, DIY may no longer be the best way to clean leather car seats.
Frequently Asked Questions
Will cleaning leather car seats remove the factory finish?
Not if you use a pH-neutral, leather-specific cleaner. Harsh household products, like dish soap, ammonia-based glass cleaner, and bleach, are what strip the finish coat, not proper leather cleaner used as directed.
Is it safe to use a steam cleaner on leather car seats at home?
Generally no, especially on perforated leather. Steam pushes moisture through seams and perforation holes into the padding underneath, which is a direct path to the trapped-moisture conditions mold needs.
How long should leather seats dry before I sit on them again?
Give them at least 30-60 minutes of air-dry time before conditioning, and let the conditioner fully absorb, usually another 15-20 minutes, before you sit down, so you’re not transferring product onto your clothes.
Can leather car seats be cleaned in cold weather?
Yes, but leather gets stiffer and more prone to cracking in the cold, so work more gently, use a slightly warmer (not hot) cleaning solution, and let seats dry indoors or in a heated garage rather than a cold one.
Does leather cleaner work on leatherette or synthetic leather seats?
Most pH-neutral leather cleaners are gentle enough for leatherette, but synthetic material doesn’t need conditioner the way real leather does. Check your specific product’s label, since synthetic finishes vary more than genuine leather does.