Nothing shows up in the paint quite like grime does on a motorcycle. There’s no hiding a dull tank or a chalky chain behind bumpers or trim. Learning how to detail a motorcycle properly changes that completely. It’s the difference between a bike that just looks “ridden” and one that turns heads at every stoplight, and it’s less complicated than most riders assume.
This guide covers the full process, from prepping the bike safely to washing, drying, and protecting every surface it’s made of. You’ll learn why wheels, chrome, and matte paint each need their own approach, plus the small habits that prevent common mistakes. Below, we’ll break down a complete checklist so nothing gets missed along the way.
How to Detail a Motorcycle
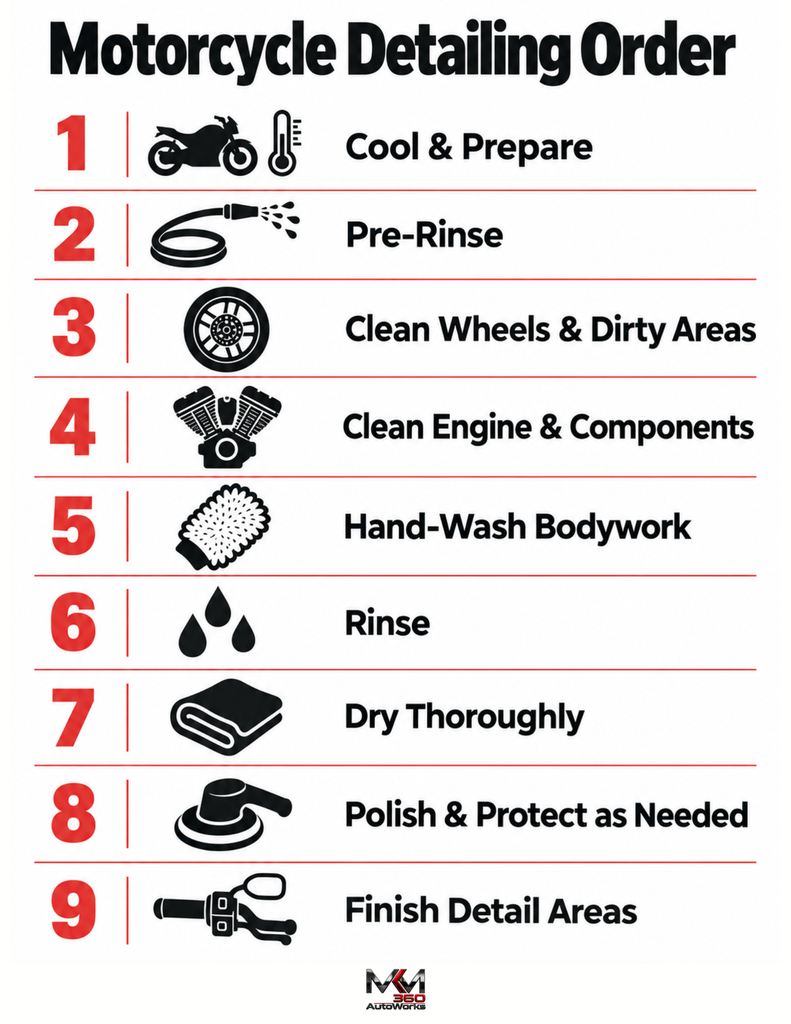
A thorough motorcycle detailing process follows a clear order to clean and protect the bike without contaminating areas you’ve already finished.
- Let the motorcycle cool completely and prepare it for washing.
- Pre-rinse the bike to loosen dirt, dust, and road grime.
- Clean the wheels, tires, and other heavily soiled areas first.
- Wash the engine, frame, and hard-to-reach components carefully.
- Hand-wash the painted bodywork and remaining exterior surfaces.
- Rinse thoroughly to remove dirt and cleaning-product residue.
- Dry the motorcycle completely, including tight gaps and crevices.
- Polish and protect painted, metal, and chrome surfaces as needed.
- Finish by cleaning the seat, controls, and other detail areas.
Each step is covered in more detail in the sections below.
Motorcycle Detailing Checklist and Supplies
A good detailing checklist starts with having the right products and tools ready before you begin. For motorcycle detailing, you can group the essentials by the job they perform:
- Washing – Two buckets, pH-neutral shampoo, wash mitt, and garden hose
- Deep cleaning – Mild degreaser, bug-and-tar remover, chain cleaner, and aluminum-safe wheel cleaner
- Detailing – Small and large detailing brushes for wheels, spokes, engine fins, and crevices
- Drying – Several microfiber towels and, if available, compressed air or a detailing blower
- Paint care – Clay bar, lubricant, and polish when paint correction is needed
- Protection – Paint sealant or wax, metal polish, chain lubricant, and appropriate protectants for plastics, seats, and matte finishes
A pressure washer and orbital buffer are optional. For a basic wash, you can also skip the paint-correction supplies and focus on cleaning, drying, and protecting the bike.
Tools by detailing level
Choose your tools based on how far you plan to take the detail. For a basic wash, keep the setup simple with two buckets, a wash mitt, pH-neutral shampoo, wheel cleaner, microfiber towels, and a blower or compressed air. These cover the main cleaning and drying stages without adding unnecessary equipment.
For a full detail, build on that basic kit with a clay bar and lubricant, polish or compound, wax or sealant, and metal polish. Add chain cleaner and lubricant, along with leather cleaner and conditioner where needed, to handle the bike’s other surfaces and components.
How to Detail a Motorcycle Step by Step
Prep and safety before you start
Most at-home details go wrong in the prep stage, not the washing itself. Before any product touches the bike, let the engine cool completely because cleaning a hot engine risks cracking components or flash-drying cleaner into streaks before you can rinse it off. Plug the exhaust pipe or pipes with rubber plugs or plastic wrap secured by a rubber band, so water can’t work its way into the header, and either cover the air intake or disconnect and cover the battery terminals with plastic sheeting.
If your owner’s manual allows it, remove the seat, saddlebags, and windscreen for easier access. But don’t spray the bike down with the seat off, as this can expose wiring and electronics the seat is designed to shield from water. Finally, work in shade rather than direct sun. Sunlight bakes soap and cleaner onto the surface before you can rinse it away, leaving streaks and water spots behind.
Pre-rinse and two-bucket wash
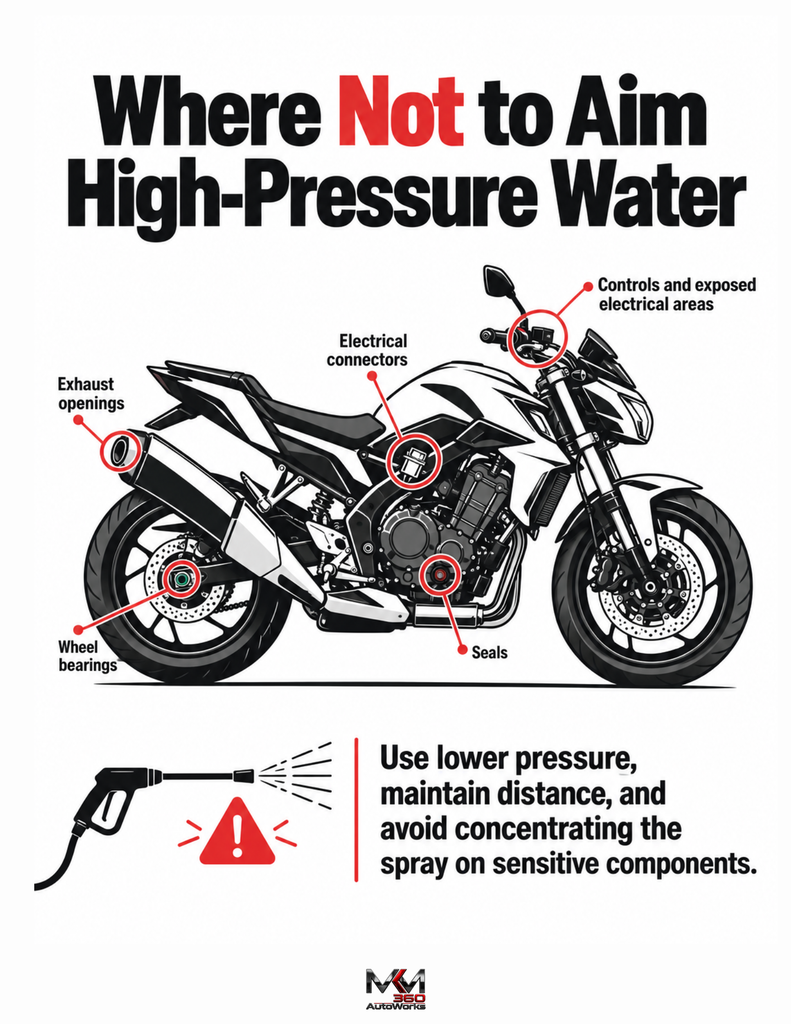
Start with a plain-water pre-rinse to knock off loose grit and surface dust. This matters more on a motorcycle than a car, since there’s no clear-coat buffer zone between panels to contain scratches. A hose with an adjustable nozzle works well for this. If you’re using a pressure washer, keep it on its lowest setting and maintain distance, especially near wheel bearings, seals, and electrical connectors.
From there, move into the two-bucket wash. Fill one bucket with soapy water and the other with plain rinse water, then dip your mitt into the soap bucket, wash a section of the bike, and rinse the mitt in the second bucket before reloading it with soap.
Wash from top to bottom in straight lines rather than circles. On a motorcycle’s smaller panels, circular motion is far more likely to grind trapped grit into a visible swirl than it would be on a car’s larger, flatter surfaces. Rinse frequently rather than waiting until the whole bike is soaped up; dragging a gritty mitt across paint is one of the most common causes of fine swirl marks on a motorcycle tank.
Cleaning wheels, tires, chain, and engine
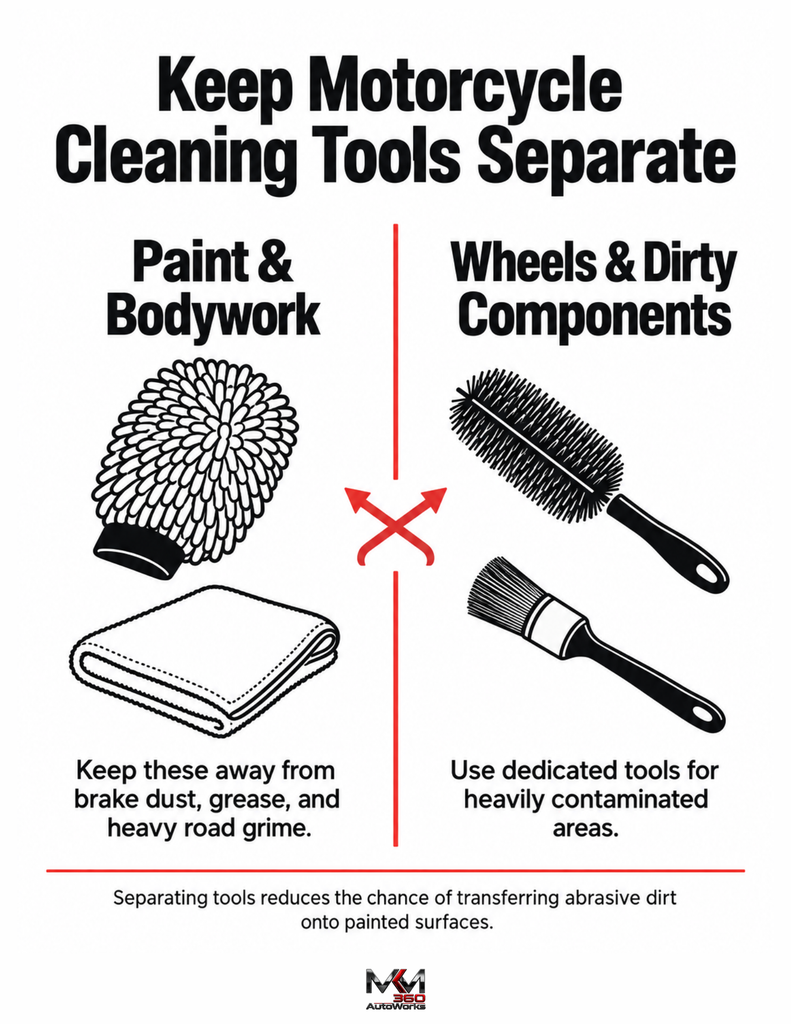
These are the dirtiest zones on the bike, and each deserves its own dedicated brush or sponge. Cross-contaminating tools between “dirty” areas and paint is how brake dust and grease end up embedded in your finish.
For wheels and tires, apply an aluminum-safe wheel cleaner and let it dwell for roughly 30 seconds before agitating brake dust loose with a brush, then rinse thoroughly.
For the chain, put the bike on its center or paddock stand so the rear wheel spins freely, then degrease the chain and sprockets with a chain-specific cleaner and a stiff brush – never a general degreaser, and never plain water, since both cause premature wear. Rinse lightly, let the chain dry completely, and only then apply a chain-specific lubricant.
For the engine, use a mild degreaser and a brush to work into the fins and crevices where road grime collects, keeping degreaser well away from any components that are still warm and never applying it at full strength. Undiluted degreaser can permanently stain aluminum and strip paint.
Drying the motorcycle
Start with a blower or compressed air on a narrow wand setting, working into crevices, fasteners, and gaps where standing water likes to hide. Follow that with a pass of microfiber towels over every painted and chromed surface to catch any water spots the blower missed.
Dry immediately after your final rinse rather than letting the bike air-dry. Water left sitting on chrome or bare metal is what leads to spotting and, over time, corrosion.
Clay bar, polish, and wax
A clay bar step is worth doing when the paint feels rough or gritty to the touch even after washing. That texture is embedded contamination like tree sap, overspray, or brake dust that soap alone won’t lift. If the paint already feels smooth and glassy, you can skip straight to polish or wax.
Polish or a light cutting compound comes next if you’re dealing with fine swirls or oxidation, applied either by hand or with an orbital buffer; a bike’s tighter curves often make hand application the more practical choice.
Wax or sealant follows, applied in thin, even coats with time to cure between coats rather than one heavy application. As with any new product, test it on a small, hidden area first to rule out any reaction with your specific paint or clear coat.
Clay bar steps
Work one small section at a time. Spray on clay lubricant, glide the clay bar gently across the lubricated area, fold the clay over to expose a clean surface as it picks up contaminants, and repeat panel by panel until you’ve covered the whole bike.
Wax application order
Apply wax to the tank first, then the fenders, then the side panels, saving chrome and other bare metal parts for last, and use a separate metal-specific polish on those rather than your paint wax.
Matte paint, chrome and leather seat care
Wax should never go on matte or satin paint. Wax contains polymers and oils designed to add gloss, and on a matte finish, that creates a patchy, glossy sheen that’s hard to reverse. The matte-safe alternative is a matte-specific detailing spray or sealant, made to protect the finish without adding shine.
Chrome takes a gentle cleaner followed by a chrome-safe polish, worked in with circular motion and light pressure. Anything gritty or abrasive will dull or pit the surface over time. Leather or vinyl seats need their own cleaner worked in with a sponge, followed by a conditioner and a UV protectant to prevent cracking and fading from sun exposure.
Motorcycle Detailing Tips and Common Mistakes
Detailing tips
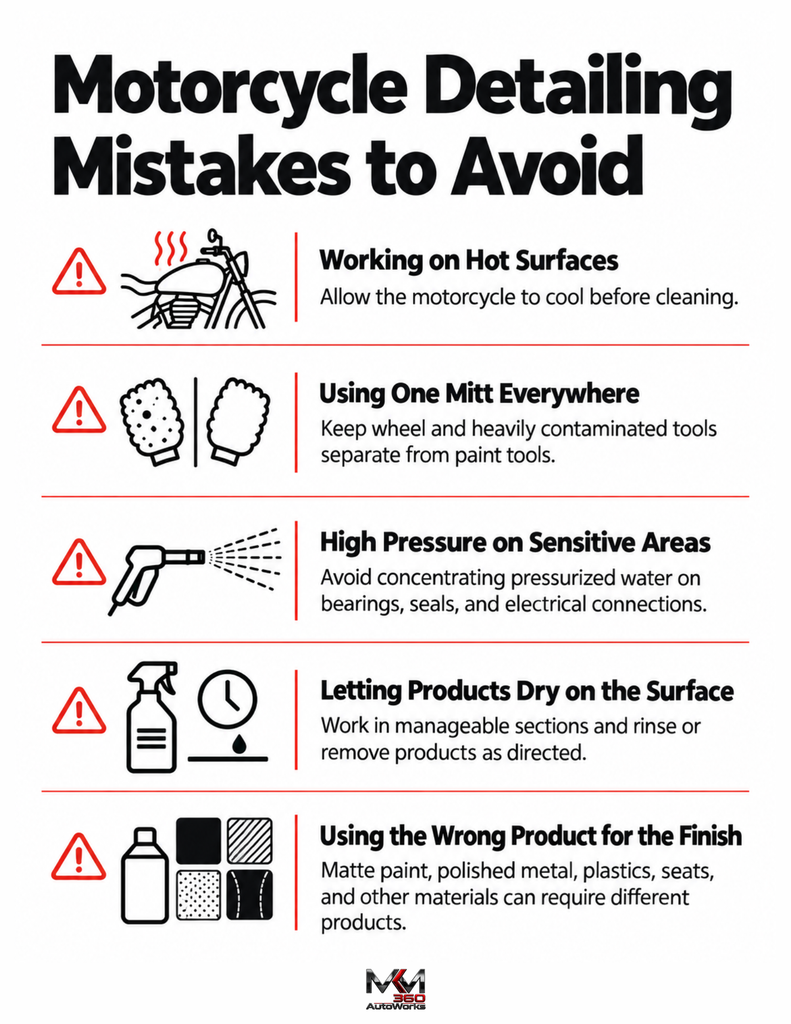
Work in small sections so cleaning products do not dry on the surface before you can wipe them away. Keep separate brushes and mitts for different areas of the motorcycle, especially the wheels and painted surfaces, to prevent transferring dirt and brake dust.
Once you’re finished, check around fasteners, seams, and beneath the seat for trapped water. Drying these areas thoroughly helps prevent water spots and moisture from remaining in hard-to-reach places.
Common detailing mistakes
Avoid directing a pressure washer at wheel bearings, seals, and electrical connectors, as high-pressure water can enter areas where it does not belong. Dish soap should also be avoided because it can strip existing wax and may be too aggressive for some rubber and plastic surfaces.
Never use the same sponge or mitt on the wheels and paint, since brake dust and road grit can scratch the clear coat. Matte and satin finishes also require dedicated products, as conventional wax can alter their appearance and create unwanted glossy areas.
How Often to Detail Your Motorcycle
How often you detail your motorcycle depends largely on how frequently you ride and where the bike is stored. A daily commuter may benefit from a quick wash every week or two and a fuller detail every one to two months because of its regular exposure to road grime. A weekend bike can usually be washed as needed after rides and detailed every few months, depending on mileage, weather, and overall condition.
Garage-kept or seasonally stored motorcycles generally need less frequent cleaning. However, a thorough detail before long-term storage is worthwhile, including cleaning and lubricating the chain and applying appropriate paint protection.
Keep in mind that washing and detailing serve different purposes. Regular washing prevents grime from building up, while deeper steps such as decontamination, polishing, and applying protection are performed less frequently and based on the condition of the bike.
DIY Detailing vs Professional Detailing
| DIY Detailing | Professional Detailing | |
| Time Required | A full day for your first one or two attempts; 3-8 hours once you’ve got your routine down | Typically 2-8 hours for a standard detail, longer with paint correction or ceramic coating add-ons |
| Typical Cost | $75-150 upfront for a starter supply kit, then mostly just consumables after that | Roughly $100-300 for a standard detail, up to $500+ with paint correction or ceramic coating |
| Skill Level Needed | Beginner-friendly for basic washing; paint correction and matte-finish work have a real learning curve | Trained and experienced with a wide range of finishes, metals, and correction techniques |
| Equipment Needed | Buckets, mitts, brushes, and basic chemicals; an orbital buffer and clay bar are optional extras | Professional-grade buffers, extraction equipment, and a full range of specialty chemicals |
| Best For | Riders who detail often, enjoy the process, and want to save money long-term | Riders who are short on time, have a high-value or specialty finish, or want paint correction done right the first time |
Final Takeaway
Knowing how to detail a motorcycle really comes down to respecting the process. Each surface, from chrome to matte paint, asks for its own approach, and rushing that is where most damage happens. The payoff, though, is real: better resale value, fewer surprise mechanical issues, and a bike that genuinely looks cared for.
Whether you’re tackling your first detail or refining a routine you’ve had for years, the fundamentals here don’t change. Start with the right supplies, protect the electronics, work section by section, and let each product do its job before moving on. With the right approach, detailing stops feeling like a chore and starts feeling like part of owning the bike. At the end of the day, that’s what keeps it running and looking its best.
Frequently Asked Questions
Can I pressure wash a motorcycle safely?
Yes, but only with care. Keep the pressure on its lowest setting and maintain distance from wheel bearings, seals, the chain, electrical connectors, and the exhaust tip. Aimed too closely or at full pressure, a washer can force water and grease out of places they need to stay.
What’s the difference between a motorcycle wash and a full detail?
A wash removes surface dirt and grime to keep the bike looking clean day to day. The full car detailing process goes further, adding paint correction, chrome and metal polishing, chain cleaning and lubrication, and a fresh coat of wax or sealant to protect the finish rather than just clean it.
Do I need different products for chrome versus painted parts?
Yes. Chrome needs a chrome-safe polish and shouldn’t be treated with the same wax used on paint, since chrome responds better to a dedicated metal polish that won’t leave the residue paint wax can on a metal surface.
Is ceramic coating worth it for a motorcycle?
It can be, particularly for bikes that spend a lot of time outdoors, since a ceramic coating adds a more durable layer of protection than wax and typically holds up longer between applications. It comes at a higher upfront cost and usually benefits from professional application to get full value from it.